


1.Foundation and Ground Treatment
Foundation requirements: The foundation of scaffolding is of paramount importance; it must be level and solid, with bearing capacity and deformation meeting standards. Just imagine how dangerous it would be if the foundation were unstable and the scaffolding wobbled! Therefore, it is essential to inspect the ground before construction, level out any uneven areas, and replace soft soil.
Drainage facilities: Never forget to install drainage facilities! Standing water is the "natural enemy" of scaffolding, as it can easily cause the foundation to soften or even frost heave. Thus, ensure that rainwater can drain smoothly to keep the foundation dry.
Anti-frost heave measures: During winter construction, anti-frost heave measures must also be taken. For example, a layer of thermal insulation material can be laid on the foundation, or heating devices can be added to ensure the foundation is not damaged by freezing.
2.Scaffolding Erection Steps
Base and base plate: Before starting erection, place the base and base plate first. The base must be securely positioned, and the specifications of the base plate must meet requirements to ensure the stability of the scaffolding.
Load control: During the erection process, always pay attention to the load issue. Do not pile materials all at once; ensure the load does not exceed the limit, otherwise the scaffolding will struggle to bear it!
Prohibition of fixing other equipment: Remember, it is strictly forbidden to fix other equipment on the scaffolding! Equipment such as mixers and hanging baskets must be fixed in other locations—do not add extra burden to the scaffolding.
Coordination with construction progress: Erection must align with the construction schedule; never erect too high at once. Generally, the height of each erection should not exceed two steps above the adjacent wall connectors, which is safer.
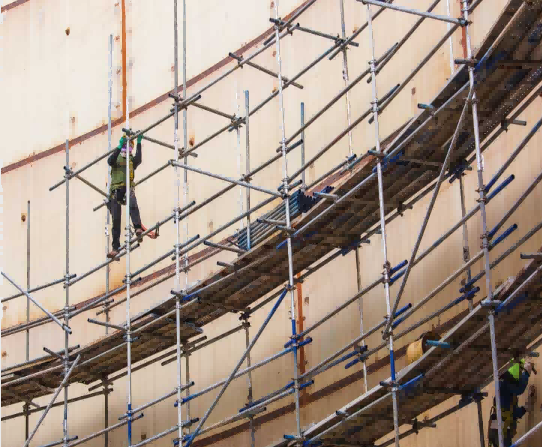
Sole plates and wall connectors: Sole plates and wall connectors must be correctly installed, as they are key to ensuring the stability of the scaffolding. Sole plates should be close to the ground, and wall connectors must be firm and reliable to prevent the scaffolding from shaking.
Setting of cross braces: Cross braces should be reasonably installed according to the height of the scaffolding. They are essential for enhancing the wind resistance and overall stability of the scaffolding!
Inspection and acceptance: Do not forget inspection and acceptance. Carefully check from start to finish, and put it into use only after ensuring there are no issues. Safety first!
3.Scaffolding Dismantling
Dismantling principles: When dismantling scaffolding, follow the principle of "from top to bottom, layer by layer"; never rush to dismantle it all at once. Take it slowly to ensure safety.
Prohibition of simultaneous upper and lower dismantling: Remember, it is strictly forbidden to dismantle from both upper and lower levels at the same time! Otherwise, collapse accidents are highly likely. Dismantling must be done layer by layer to ensure the stability of the frame.
Dismantling of wall connectors: Wall connectors must also be dismantled layer by layer along with the scaffolding, and must not be dismantled in advance. The height of segmented dismantling should not exceed two steps; if it does, additional wall connectors must be added for reinforcement.
Post time: 2025-08-08 13:45:32